Working with Seating Charts
REMEMBER!
The seating chart icons reveal confidential student information (SpED, 504 plan, gender identity, health info etc) that should not be seen by other students.
Please do NOT project your seating chart, put up on a TV, or display to others in any way.
Working With Seating Charts
Synergy offers several nice features when working with seating charts: the option to always keep your chart alpha sorted, the ability to randomly shuffle students' seat assignments and the option to view students' current class grades on your seating chart.
Contents
- Creating or copying a seating chart
- Adding new students to a chart
- Changing chart display preferences
- Deleting a seating chart
Interface Overview
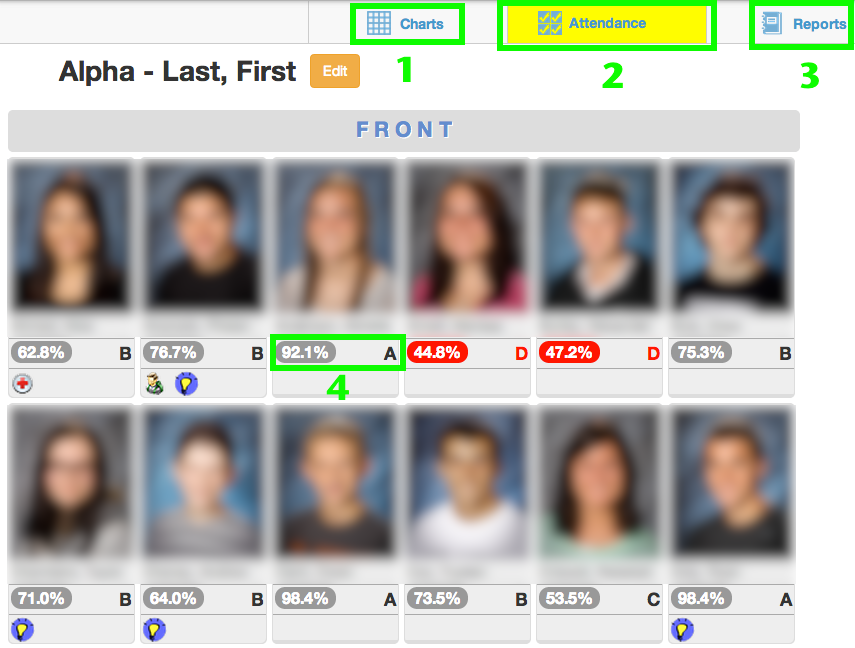
-
Charts button lets you quickly switch between your different seating charts or create a new one.
-
Attendance button for taking attendance by list or by grid. The button is currently highlighted in yellow, indicating that attendance has not been taken yet.
-
Reports button for generating reports like class lists, student/parent directories, class health conditions etc.
-
Overall class grade: Display secondary students' overall class grades.
-
Zoom slider for changing chart magnification level (not dimensions).
Create a New Seating Chart
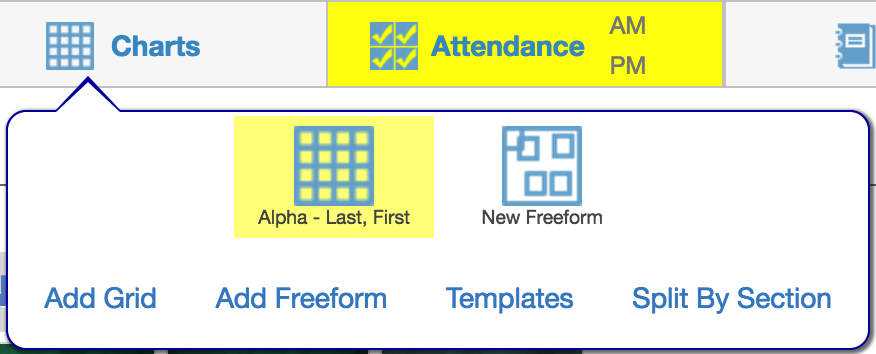
1. For basic charts, click the "Charts" button and select either "Add Grid" or "Add Freeform." A new chart will be created and you will be put into edit mode. You can also create a new chart from a copy of an existing chart. Note: While you are in edit mode, the "Home," "Grade Book" and "Report Card" menus will be inaccessible until you save or cancel your changes.
- Clicking "Templates" will let you create a chart template (with furniture, teacher desk, student seats etc) that you can use when creating freeform charts.
- Clicking "Split By Section" applies only to teachers with multiple sections during the same period. This option will split students into separate charts based on the section they are in.
2. Give your chart a descriptive name. It is best to avoid special characters (& * etc) in the name as they may cause issues.
3. Add students to your seating chart and edit your chart configuration as described below.
4. Click the green "Save" button.
Copying an Existing Seating Chart
1. Use the "Charts" button to select the seating chart you want to copy.
2. Click the "Edit" button.
3. Click the "Copy" button.
4. Give the chart a new name and edit your chart configuration as desired. Avoid special characters (& * etc) in the name as they may cause issues.
5. Click the green "Save" button to save your changes.
Adding and Rearranging Students
If you have students in your class that do not appear on your seating chart, you will most likely see a notification like the one below.

1. If you are not in edit mode, select the chart you want to edit from the "Charts" menu and then click the "Edit" button. Note: While you are in edit mode, the "Home," "Grade Book" and "Report Card" menus will be inaccessible until you save or cancel your changes.
You will see your sections for the currently selected period listed in the top right corner. If you teach more than one section in the same period, make sure the checkbox in front of each one is checked.
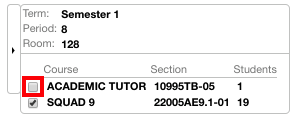
The "Academic Tutor" box needs to be checked in order to add that student to the chart.
The "Unassigned Students area lists student who are in your class, but not on your seating chart. It also provides provides options for rearranging students that are already on your seating chart. Important: set your chart dimensions large enough to accommodate all students in your class. A chart that is 6x5 will not have enough seats for a class of 31+ students
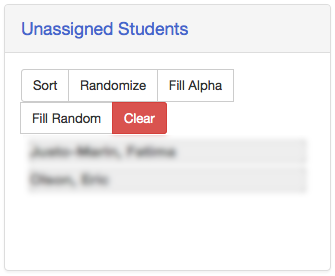
Unassigned students show on the right side of the screen for grid charts.
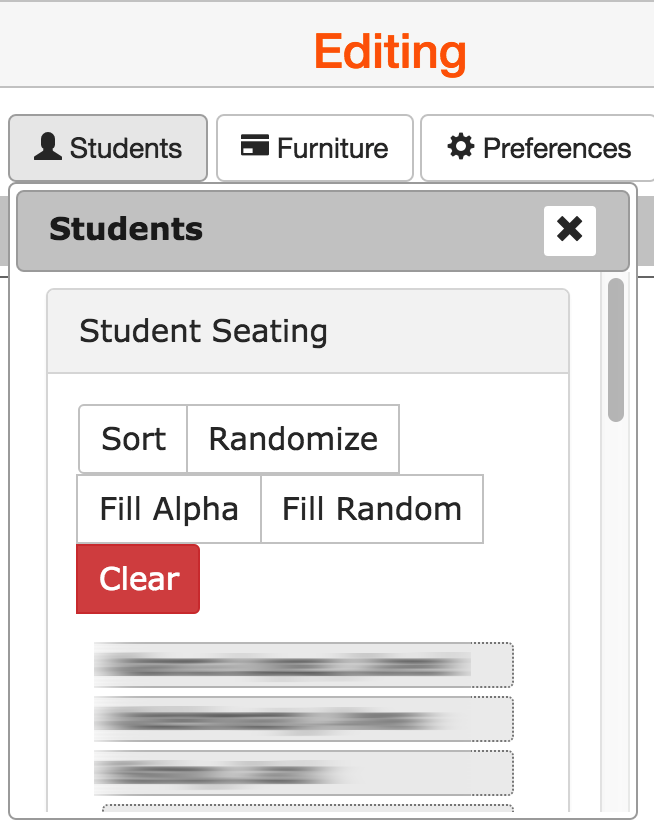
Unassigned students appear in a "Students" menu at the top of the screen for freeform charts.
Rearranging Students
-
Sort Button will arrange students already on the chart into alphabetical order. Important: clicking "sort" on a freeform chart will move students into a grid formation! Both the student and the seat position will change.
-
Randomize Button will shuffle students already on the chartrandomly into new positions. Students move, seat positions do not.
-
Click and drag students to an empty seat (grey rectangle) on a grid chart or empty space on a freeform chart.
Adding Students
When adding students to a chart, make sure you have empty seats to accommodate them. See "Changing Chart Display Settings" below.
-
Fill Alpha will add unassigned students to the chart and arrange all students in alpha order. The system will automatically expand grid chart dimensions if needed.
-
Fill Random will add unassigned students to the chart and arrange all students in random order. The system will automatically expand grid chart dimensions if needed.
-
Click and drag students from the "Unassigned Students" area to any empty grid chart seat (grey rectangle) or open space on a freeform chart. If your grid doesn't have any empty seats, you will have to adjust your chart dimensions as described below.
Changing Chart Display Settings
1. From the "Charts" menu, select the chart you want to work with. Click on the "Edit" button. Note: While you are in edit mode, the "Home," "Grade Book" and "Report Card" menus will be inaccessible until you save or cancel your changes.

2. At the top of the screen, you can change the name of the chart, save any changes, copy the current chart to a new chart or cancel without saving changes. Avoid special characters (& * etc) in the name as they may cause issues.

3. On the right side of the screen, you will see a "Seating Chart Configuration" area for setting chart dimensions and display preferences. You will also see an "Unassigned Students" area listing students in your class that are currently not in your seating chart.
4. Make your desired seating chart configuration changes.
5. Optionally, add or rearrange students.
6. Click the green "Save" button to save your changes.
Recommended Settings
Student Name Format Pulldown Menu
- Important: Set the student name format to Last, First Name Goes By so you will see students' preferred names.
Checkboxes
-
Show Student Photos (default)
-
Show Pronouns (default) Note: This option was added late in the 2022-23 school year so there will be no information to display early on.
-
Show Notifications Displays alert icons: family alert, health alert, SpEd, TAG, ELL, etc
-
Show Birthdays displays a cake icon for students with upcoming birthdays.
The "Front Of Classroom pulldown menu will simply add a "Front" label in the area you specify.
Seating Chart Dimensions
Available for grid type charts only. Set how many rows and columns you want. Important:set your chart dimensions large enough to accommodate all students in your class. A chart that is 6x5 will not have enough seats for a class of 31 students
Deleting an Existing Seating Chart
1. Use the "Charts" button to select the seating chart you want to delete.
2. Click the "Edit" button.
3. Click the "Delete" button.
4. Click "Yes" on the confirmation window that appears.