How to grant students access to an assessment that was initially set to "no access."
1. Open the Assessment Dashboard screen.
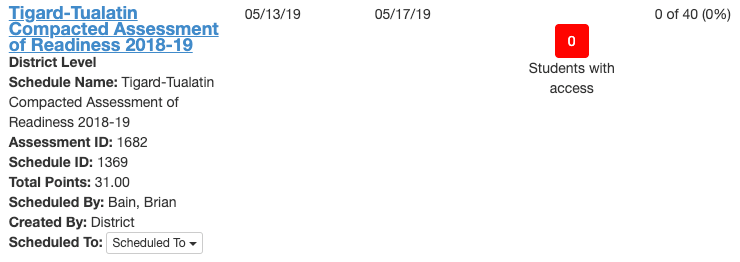
2. Locate the assessment under the "You Scheduled" or "Scheduled For Your Class" tab. You will see a square indicating the number of students that currently have access to the assessment. Click the square to make changes.
3. Click anywhere on the red bar to cycle through the following choices: light green=grant access following assessment schedule, dark green=grant access regardless of schedule, light red=no access. Clicking on the + button will let you make these choices by student.

Granting/removing access by whole class. Click the + to make choices by student.
4. In addition to providing/denying access to the assessment, you can use the pulldown menu to select accommodations for a student. In the picture below, student 2 has been given the ability to take notes, use a calculator and use text to speech in the assessment.
-
 Sets the selected accommodations as your defaults for that student in future assessments.
-
 Sets the selected accommodations as global defaults for that student in future assessments. Other teachers can still set their own accommodations, but yours will be used if they don't.
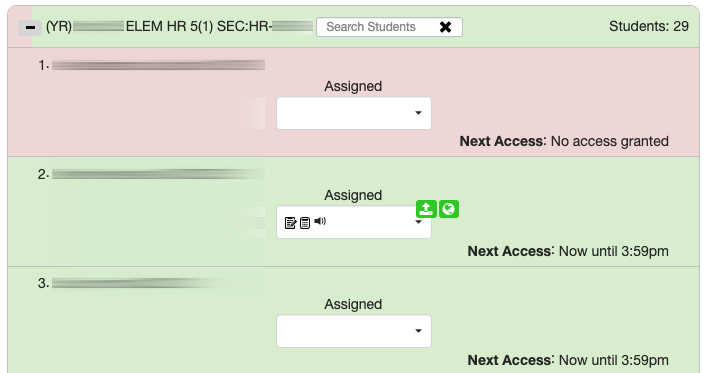
Granting/removing access by individual student. Student name and ID (blurred in pic) will display on the left.