How to Assign a Default Printer for Infinite Visions
How to Assign a Default Printer for Printing in iVisions or Infinite Visions
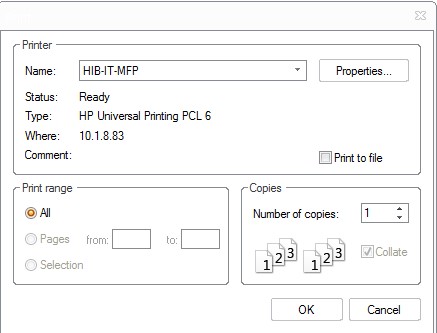
Users will find that going to File > Print > Print Setup option from the main window in iVisions or Infinite Visions displays a dropdown list of printers available. However, users can’t assign a default printer from this window.
Print Dialog - Wrong Print Window
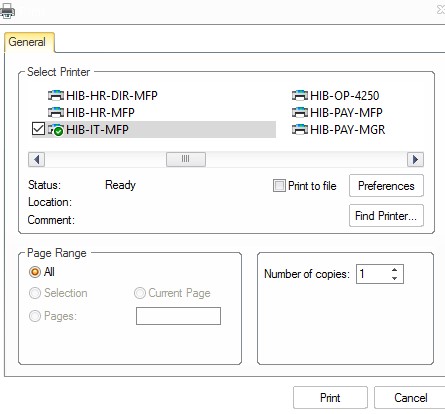
System Print Dialog - Correct Print Window
Pro Tip: Use the Report Viewer window to assign a default printer.
Instructions
1. Open the Report Viewer
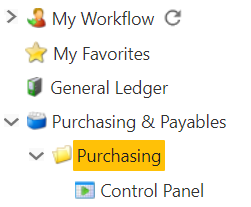
a. Go to Purchasing & Payables > Purchasing > Control Panel.
b. Click Apply Selection to display records. From the grid, select any record.
c. Go to Actions > Print Preview. A small window pops up, click OK.
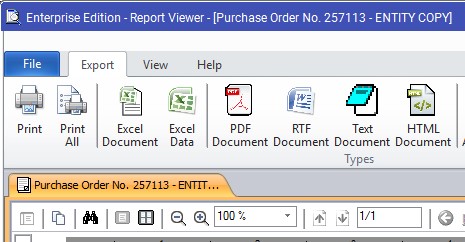
d. From the Report Viewer window, go to the Export tab and click on Print.
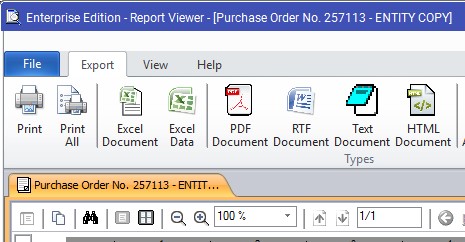
The correct Print Window displays.
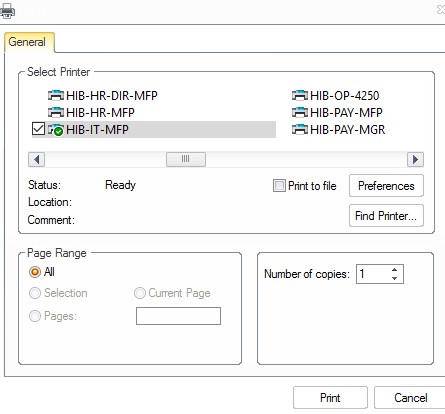
2. Select a Default Printer
a. Right-click on a printer.
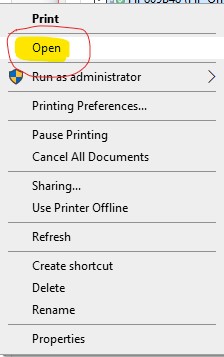
b. A blank dropdown menu will appear.
c. Select the 2nd blank space on the menu.
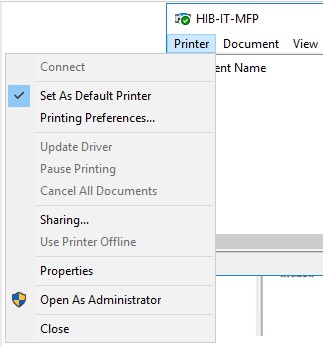
The blank dropdown menu is the Print Options menu without the wording. Here is a side-by-side that defines what each empty menu bar space is.

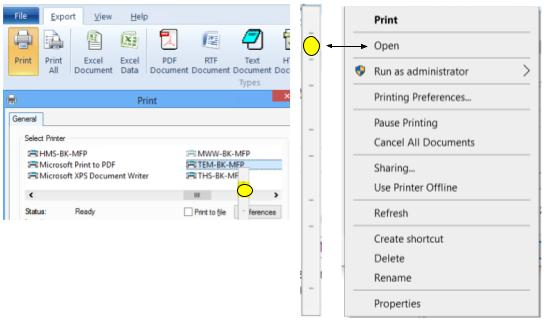
d. From the menu bar, click on Printer.
e. Click on Set As Default Printer.
f. Click on X to close this window.
Printer not listed? If you do not see the printer you want to use, the printer is not set up on the IV Server.
Please leave a comment with the printer model and IP Address in your tech request. You will be notified when the printer has been added.